" ". The Smiling Cat

Sunday, July 13, 2014

Pretty Pink & Blue Floral Double-sided Napkins and So Simple Quilted Place-mats

 DSC03408 (1)
Lately, I’ve been looking for ways to cut my grocery bill.  I’m sure many people can understand why!  I’ve been trying to limit the amount of disposable items, such as napkins.  Cloth napkins are not only Earth friendly, they’re also budget friendly, and just nicer in general.  So, I started looking around the www and found loads of good ideas. 
1 (2)
I came across many tutorials and decided to start with these two-sided napkins.  Not only are they easy to make, they don’t wrinkle as much when laundered.  They have a nice, heavy weight and give you some fun options in mixing and matching fabrics.  For everyday use they don’t need to match, so it’s a great way to use up some remnants.
1
I went through my considerable fabric stash & picked out a pretty pink & blue floral cotton for the napkins. I also picked a nice solid blue cotton to make some matching place-mats.  I like the standard 20”x20”  size napkins.  Usually, I would cut out two 21-1/4” squares to sew together for each napkin.  But, because the floral fabric has a secondary grid-like pattern, I decided to cut out a single 21-1/4”x42-1/4” rectangle.  I thought it would be easier to keep the white lines straight. 
2
Because the fabric was 44” wide, it was quicker to measure a 21-1/4” length, and just make one cut across the fabric, and trim a little off.  I folded the rectangle in half and pinned it all the way around, including the folded edge.  I left a small opening to turn it right-side out after sewing a 1/2” seam all the way around.  I always add the extra 1/4” for the seam when turning a project inside out.
3
I back-stitched at the beginning and the end of the seam.  Trimmed off the corners, and turned it right-side out.
4
I used a small plastic tapestry needle to push out the corners, being careful not to punch through the fabric.  You could also use a knitting needle.
 5
Then, I carefully pressed the turned napkin.  It’s hard to press out the edges completely.  So, I keep a small bowl of water handy.  I wet my fingers and roll the edge between my thumb & fore finger to push the edge all the way out.  After pressing, I pinned close the opening and topstitched all the way around the edge.
 6
I followed these same steps to make the place-mats.  Only I cut two fabric rectangles & a piece of quilt batting at 15-1/4”x21-1/4”, to make a finished 14”x20” place-mat.  Then:
11  22
33
After pressing the place-mat, I used a pencil & my quilt ruler to mark the quilting lines.
7
I just marked & quilted it in quarters both ways.
88
Then, I stitched a line of quilting beside each of the first lines, using the width of the presser foot as a measure.  I’m very pleased with the way they turned out-
 DSC03874


4
I made another set, with a bright, summery strawberry print on one side, and solid black on the other.  I really like the contrast of the fabrics, I think it gives them a modern look.
 5

 2

Well, that’s all for now.  Hope you are having a great day!   -Carole


Saturday, May 24, 2014

Vintage Liberty Blue & White Transfer-ware Dishes

DSC03213 (1)
I love this time of the year!  Spring has sprung.  The days are long, warm & sunny.  It’s also the beginning of yard sale season, time to start treasure hunting again……This last weekend I was on the way back from the store and came across the end of a yard sale.  Boxes were being re-packed, usually the sellers don’t want to put all the left overs back in the garage, and you can really get a good deal.  I don’t think that I’m a cheapskate, but I love getting a good deal.  It’s all part of the fun.  Anyway, I could see there was a box of blue & white dishes which seemed so familiar.  I made an offer, which the owner happily accepted, and drove off with 2 boxes of blue & white dishes.  When I got home and unpacked the boxes, I recognized the Liberty Blue pattern.  My Mom had brought some of these dishes at the grocery store.  I remembered seeing them displayed at the Jewel.  I started doing a bit of research and discovered………
The Benjamin Franklin Federal Savings & Loan was a financial institution established in 1925.  To celebrate their 50th anniversary in 1975, they looked for something special to offer their account holders.   They also wanted a 1976 promotional premium item to tie in with the 1776-1976 bicentennial celebration of America’s Declaration of Independence from England.  They contacted the Enoch Wedgwood Company, located in the historic Staffordshire district of England.  Enoch Wedgwood (1813-1879) was an English potter, founder in 1860 of the pottery firm Wedgwood & Co of Tunstall, Stoke-on-Trent. He was a distant cousin of the famous potter Josiah Wedgwood, of Josiah Wedgwood & Sons, but their two businesses were separate concerns.  Wedgwood & Co was renamed Enoch Wedgwood (Tunstall) Ltd in 1965 and in 1980 it was taken over by Josiah Wedgwood & Sons, who renamed it Unicorn Pottery.  Many of the vintage Avon keepsake dishes were made by this company.  They developed a unique pattern of ironstone dinnerware, the Staffordshire Liberty Blue, for the savings & loan company.  Ironstone is a type of pottery first made in the United Kingdom in late 18th-century.  It is often classed as earthenware, although in appearance it is similar to fine stoneware.  It was developed in the 19th century by potters in Staffordshire, England as a cheaper, mass-produced alternative for porcelain.  Its name is derived from its strength & durability.  The Liberty Blue dinnerware was made in the tradition of the 19th century Staffordshire historical blue china, also called transfer-ware.  “Transfer” designs were first applied to ironstone by Miles Mason, in an attempt to copy the designs of Chinese porcelain.  Transfer-ware is most often in one color, such as blue, against a white background.  Some patterns have colored details that were added on top of the main design.  These designs range from dense patterns that cover the piece, to small, delicate floral motifs.  The Liberty Blue pattern consists of fifteen different historic scenes from the American colonial period.  It is ironic that this tableware pattern, celebrating Colonial America’s independence from England, was created in England.
HISTORIC SCENES:
  • Washington crossing the Delaware from
  • Lafayette landing at West Point
  • The Boston Tea Party
  • Paul Revere on horseback
  • Old North Church
  • Ben Franklin
  • Mt. Vernon – George Washington’s Home
  • Monticello – Thomas Jefferson’s Home
  • Independence Hall
  • Washington leaving Christ Church
  • Betsy Ross – the nation’s first flag
Each dish has a historic scene in its center and a border pattern of wild flowers.  Such as this Betsy Ross dessert/berry bowl.
2 
On the backs, there is a unique stamp in the center with an eagle holding a flag, shield and a banner with the words ”Original copper engravings of historic colonial scenes printed on Staffordshire Ironstone.  Detergent and Dishwasher safe.”  Above the eagle are the words “Liberty Blue.” Directly below the shield are the words “Made in England.” Finally, at the bottom, is the name of the scene.
6 
The association launched the promotion in 1975.  When a subscriber made a new deposit of $50, he received a free four place setting.  If a customer deposited $1,000, he could buy a 45-piece set for only $45.   Additional settings could be purchased.  The Liberty Blue dinnerware was made for two years.
In October 1976, the association announced it was discontinuing the promotion at the end of the year. After that time, customers could order pieces from the Sigma Marketing Co. of Garden City, N.J.
Sometime after 1976, Liberty Blue dinnerware was offered to grocery stores nationwide for promotional use.  For so many dollars spent on groceries, the customer could buy a different piece.  Each week there would be a different item to purchase.  This must have been the display I remember.  The dinnerware disappeared from the scene by the mid-1980s.
liberty-blue-ad  
The arrival of eBay created a market for the dinnerware as original purchasers and those who inherited sets wanted to complete them or add accessory pieces. In 2002, Debbie and Randy Coe authored "Liberty Blue Dinnerware," published by Schiffer Publishing Ltd.
 
1  
  
 
1


2


If you are looking for more Liberty Blue dinnerware, visit the Robbin's Nest.


And just because it’s so pretty, here is a French Country table by Debbie at:  Confessions of a Plate Addict

[CONFESSIONS%2520OF%2520A%2520PLATE%2520ADDICT%2520Tablescape%2520in%2520Blue%2520and%2520White19%255B2%255D.jpg]

Well, that’s all for now.  Hope you are having a great day-Carole


Friday, March 21, 2014

Learning the Basics of Bargello-A Belated Valentine Table Runner

DSC00810 (2)
 
For quite a while I’ve been intrigued by the precision of Bargello quilt patterns.  They seem so complicated, I’ve been afraid to start one.  Last Christmas I bought my quilting buddy, Debbie, the book:  “Bargello Quilts” by Marge Edie.  I thought  it would fun to try to make one together.  Between the two of us, we should be able to figure it out.  If you are unfamiliar with Bargello:          
Bargello is a type of needlepoint embroidery consisting of upright flat stitches laid in a mathematical pattern to create curved  motifs. The name originates from a series of chairs found in the Bargello palace in Florence, which have a "flame stitch" pattern. Traditionally, Bargello was stitched in wool on canvas.  Traditional designs are very colorful, and use many hues of one color, which produces intricate shading effects. 
Here is an example of the “flame stitch”-
  Florentine (2)
In addition to Bargello embroidery, there are Bargello quilts in which these embroidery patterns are constructed with strips of fabric instead of wool.  In Bargello quilting, long strips of fabric are sewn together lengthwise, then the first and last strip are sewn together, forming a loop. The loop is laid flat on a cutting mat, and then cut vertically to make many narrow loops. The quilter then opens the loops by pulling out the stitching between two pieces of fabric, making a long, flat strip.  By opening the loops in between different pieces of fabric (for instance, between the first and second piece on one loop, then the second and third piece on the next loop), the quilter can make the colors of the quilt appear to curve. Slicing the loops very narrowly makes the curve appear sharp; cutting wide loops creates a more gentle movement in the quilt.  Bargello patterns are usually “quilt as you go” projects.  The individual strips are sewn on a base of backing and a flat cotton batting basted together. Working from the center toward the edges, using a sew and flip method to add each strip so the machine quilting shows only on the back side of the quilt. 
Okay-simple enough…..
 
I had some 1-1/2” red & white fabric strips left from a few Christmas projects, so I decided to make a very simple pattern for practice.  First, I randomly  sewed all the strips together lengthwise, using a 1/4” seam.  I didn’t want to deal with a complicated pattern, I just wanted to learn the technique.  When sewing the strips together, I started with a middle strip, and alternated sides when adding the other strips.  If you keep adding to the same side, it will curve in that direction.  I also used a smaller then usual stitch length to sew them together, so they wouldn’t pull apart later.
    
After pressing all the seams in the same direction, I sewed the first & last strips together lengthwise to make a sort of tube.
 
I then laid it flat on my cutting mat, lining-up all the lengthwise seams, and trimming the edge even.  Next, I began cutting 2-1/2” strips off the end of the tube, much like slicing bread. 
 
When all the strips were cut, I decided which rectangle would be the beginning rectangle , and removed the stitching in the seam between the beginning rectangle and what would be the ending rectangle.
  

I put this strip aside and picked another loop.  With this strip I moved over one rectangle to the left, and removed the stitching between the next two rectangles.  I continued strip by strip, each time moving over one rectangle to the left.  Creating a staggered pattern.  I handled them as carefully as possible, to avoid separating the wrong seams.
   
When all the strips were opened correctly, it was time to start sewing them together.  Starting with the first & second strips, taking my time and matching up the many intersections of the seams carefully.  Still using a 1/4” seam allowance.  I used many, many pins!  Also, when joining the first two strips, I  had to press the seams in the second row in the opposite direction of the first row.  Having the seams facing in opposite directions is always important, but in this case with so many small seams, it’s a must! 


I didn’t use the sew & flip method with this project, because I wasn’t using a pattern and I didn’t know how big it was going to be in the end.  I think it would help to keep the project stable.
   
I continued adding the rest of the strips, making sure the seams lined up.  Pressing after each row, and making sure the seams were facing in the opposite directions. 


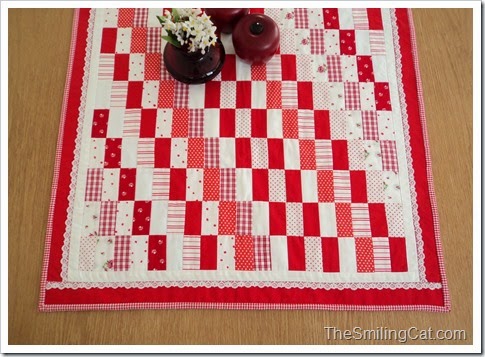
I was happy with the way all the different fabrics came together!  I added a red border & a little white lace, and I had a small table runner.
 DSC00839 (1)
I added a layer of batting, lined it with plain white cotton backing & did a little quilting…….

DSC00835 (1)
And used small scaled red & white gingham for binding.

DSC00814 (1)

Even though I didn’t have it finished by Valentine’s Day, It is my valentine for this year.  This project came together much easier than I thought, and it has encouraged me to try a more complicated pattern in the future.
DSC00820 (1)
 DSC00826 (1)
Well, that’s all for now….Hope you’re having a great day! 
Please leave a comment if you have the time & let me know what you think.


Sunday, November 3, 2013

Beautiful Memory Quilt Up-cycled from a Wedding Dress

This is so beautiful-I had to share!

1383894_533617470056145_1530991959_n
Featured Member Quilts - 24 Blocks

This is the loveliest keepsake quilt I can imagine, it was featured on 24 Blocks FB page.  It was made by Lucy  Portsmouth for one of her customers from their wedding dress.

Lucy commented:  "I made this quilt from a wedding dress... the beading was lifted off the dress and re-attached to the quilt, and the whole thing is machine embroidered with a flowing leaf pattern.... the tulle ruffle around the edge was made from the dress petticoat."  The amount of handwork involved is clear in the photo and Lucy's hard work has resulted in a beautiful quilt.

I guess this kind of project has never occurred to me, because I've never had a big, formal wedding, and no expensive gown- but.....it makes so much sense!  A wedding dress is often the most special, if not the most expensive item in a woman's wardrobe.  Most women don't want to sell their wedding dress, but why just put it away for future use by a daughter or other relative?  It may be difficult to consider cutting up such a treasure, but why not use the material to create something elegant that can be used & enjoyed every day?!  Not just the fabric; add the lace and other special details like the buttons, beads & other trim. Maybe one of the bridesmaids would be willing to "contribute" her dress to the project, to add a bit of color and continue the wedding theme.  I imagine the tricky part of the construction, is reusing the delicate fabrics typically used for wedding dresses.  Foundation piecing might be a good technique to use. 

What an amazing gift for a sister or friend who can’t sew! 

Inspired by this, I explored online a bit to see what info I could find.  Unfortunately, I mostly found ads by those who want to create, then sell you a memory quilt.  After digging around, I did find these tutorials....

This first one is from www.Netplaces.com:


"Quilt A Memory" by Terrry L. Rye & Jacquelynne Johnson

Quilt A Memory Pattern~

This quilt isn't made from a wedding dress, but I love the look.  Their free pattern is clear & detailed, although a bit dated!  It would be easy to use this pattern as a guide to take your own direction.  This is a signature quilt made from white cotton squares signed by guests at the wedding reception.

Also a good idea from www.WeddingBee.com.....

Memory Quilt :  wedding palm springs Quilt2

How To Make a Memory Quilt~

This is also a signature quilt with a nice tutorial about stamping the signatures permanently with ink.  This one also suggests collecting the signatures at the bridal shower rather than the wedding reception...interesting?

I suppose any traditional block can be used, or simple crazy quilting:


(via:  Pinterest)
 
Or more ornate:


(via: kittyandmedesigns.blogspot.com)
 
I have to show these, just because these are so pretty:


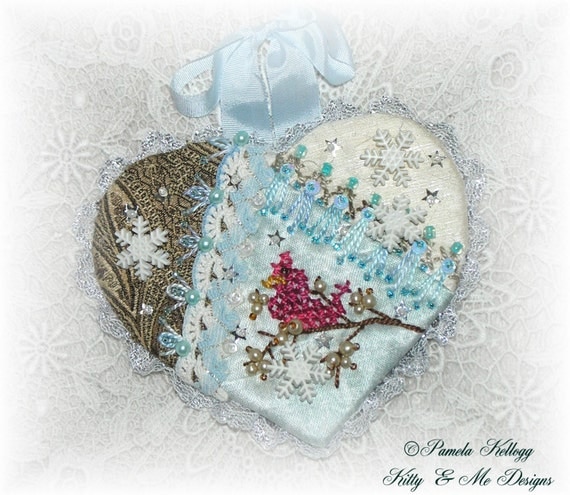
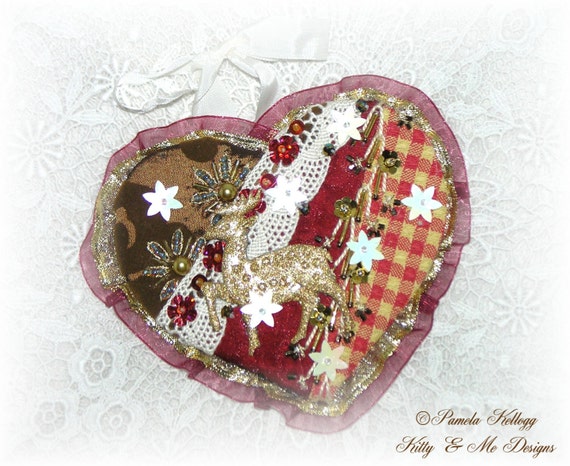
Crazy quilted Christmas ornaments, also designed by Pamela Kellogg of  Kitty and Me Designs.

Interested in Crazy Quilting?:

History of Crazy Quilts~

Wedding dresses aren't of much use sitting away in a closet just wasting space.  Think about repurposing them into something useful & full of beautiful memories!  Also, there are many lovely wedding dresses that have been donated to thrift shops or are for sale in consignment shops.  Not all will get a second life in a wedding and the fabric they contain might a special, new keepsake.

Saturday, September 7, 2013

Thrifty Blue Pinstripe Pinwheels Made from Men’s Shirting


I love men’s cotton shirting fabric, and (don’t laugh) I always look through the men’s shirt section when thrifty shopping.  I find quite a few good quality, cotton dress shirts that don’t show much, if any wear, and only cost around $5.00.  The colors may be muted, but come in delightful large & thin stripes, paisleys, and other fun prints.  Each long sleeve shirt can be cut into five good-sized pieces:  two front pieces, two sleeves and the back.  You end up with at least a yard of good quality, usable fabric, and get several nice-sized buttons as well.

I found this pretty, medium blue with a narrow orange pinstripe cotton.  Great colors & I love the woven texture!  I paired it with a dark yellow cotton linen, left-overs from a past project, that I’d already cut into 5” squares.  Pinstripes….led to pinwheel squares. 
To make 64 (3-1/2”) pinwheels, I used: 
  •   32-5” squares of pinstripe men’s shirting- One large Men’s long-sleeve dress shirt should be plenty.
  •   32-5” squares( 5/8 to one yard) of bright yellow cotton linen
You could use this pattern to make pinwheels using pre-cut 5” Charm Squares.  You would be able to make two pinwheel squares from each 5” charm square paired with yellow, white or another neutral color.
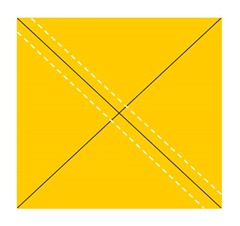
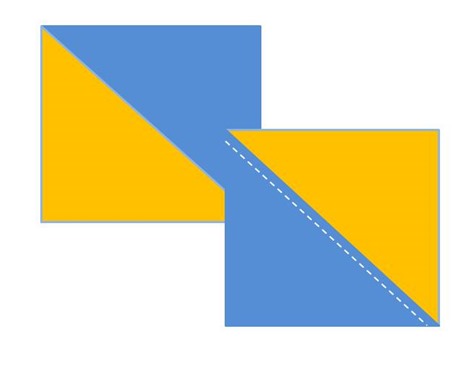
In order to make the pinwheels, I needed to make 1/2 square triangles.  The yellow linen was already cut into 5” squares, so I cut a few 5” squares of the striped fabric to experiment with some ideas.  I settled on making four 1/2 square triangle units from each 5” square pair of fabrics, using the ‘X marks the spot system’.  I began by marking a pencil line on each diagonal.
Presentation1a
After marking the X-I fed them one by one through my machine, corner to corner, chain sewing a 1/4” seam on both sides of each drawn line. Because I was cutting so many units from each square, and so much handling can pull out stitches, I did a quick backstitch at the beginning and end of each square.
Presentation1b
Quick tip:  When reaching the end of first chain, DON’T cut them apart yet!  With needle still down in last stitch, raise presser foot, turn around and then sew down the other side of the line, while they’re still attached.

 
Just pull them along, twisting and turning them right side up.  This saves time and thread!  Now cut to separate, clipping both threads at once.
After cutting them apart, I pressed them, being careful not to pull and distort the fabric.  I repeated these steps on the other diagonal:
Presentation1c
  I pressed again, using spray starch, and then cut the squares in half lengthwise……


…………………………………………………………………………………and cross-wise.
Presentation1d
Lastly, I cut the resulting squares in half by cutting on the pencil line.
Presentation1e
After cutting them apart, I carefully pressed the units open, pressing toward the blue cotton.  I noticed that even though this is a simple, even stripe-I got four distinctly different 1/2 square triangles, which were approximately 2” square.   So, I sorted them into four stacks, and arranged these stacks in the correct placement of the pinwheel, keeping the stripes going the same direction.
  
I finished one block as a “master” and kept it to compare each new block to as I continued.  I started with the top row of units, flipping the right unit over the left unit, right sides together, lining up the diagonal seams.  I stacked the pairs, keeping the side to be sewn to the rightPresentation1fI chained stitched the units together, using a 1/4” seam, then pressed open.  Because the yellow linen is thicker, I pressed toward the blue stripe fabric, and trimmed off the little triangle ‘dog ears’.  I did the same with the bottom row.  Then, I matched the center seams and sewed the top row to the bottom row.  This time I pressed the seams open.


I trimmed the pinwheels to 3-1/2” square.  Pretty-  huh?!


To connect the pinwheels.  I cut 1” strips of an orange cotton as sashing.  I divided the pinwheels into two piles, and started by sewing a sashing strip to the bottom of the first pile. I pressed toward the sashing, then added the second pinwheel to the opposite side of the orange sashing.
 
Again, I divided the units into two piles, and connected these units with another strip of orange sashing.  These completed blocks were 7” square.  Then, I cut 1-1/2” sashing strips of a solid blue cotton.  I repeated the same steps as with the orange sashing to join the pinwheel blocks together, to form 4-pinwheel blocks.  These measured 14-1/2” square.


I ended up with four of the 4-pinwheel blocks, and connected them with more of the blue sashing.  I used the blue sashing as the first border.  Then added a 1/2” yellow border, and a 1-1/2” border of a pale blue cotton that I decided to use as the backing.  Another border of the remains of the 1/2” orange sashing, and then the last of the 1-1/2” medium blue sashing.  This project sure made a dent in my scrap stash, and I love the bright colors!


Here it is layered, pinned and ready for quilting.  I haven’t quite decided how to finish this project.  But, I’ve just been using up some of my ‘left-over’ fabrics, so why not experiment a bit?   
That’s all for now-Carole