

One thing that all people that sew have in common are fabric scraps. Everyone seems to have their system for organizing them. I like to cut my scraps into 5" squares or "nickels", as they are sometimes called. These are useful as they can be cut into 3-1/2" squares, or 2-1/2" squares. The smallest size I keep are 2" squares.
Eventually, I end up with this:

Time for a scrappy project....! I began by sorting my 2" squares by matching fabrics and colors. I decided to make simple 9-patches for a table runner.
To make a 23"x55" table runner I used:
300 2" scrappy squares
240 2" white squares, or 3/4 yard white cotton cut into 2" strips.
1-1/2 yard for backing and binding.
Thread and basic sewing tools.
This did make a substantial dent in my scrap pile. I began to match sets of five matching squares and sets of four with a complimentary square for the middle.

Then I staked up the sets and cut the 2" white strips. To save time, I began to set up to strip-piece the squares.


I took my stacks and strips to my sewing machine. I put down a white strip and taking from the top of the stack, and started placing one square at a time onto the white strip. Sewing with a 1/4" seam with right sides together, carefully keeping the squares in order. I put aside one square from each set.

After sewing a few strips, I pressed them to set the stitches, then cut them into separate units. Then I pressed them toward the scrappy square, so that there would not be a shadow on the white squares.

After pressing each pair, I put one pair aside, then stitched the square that was set aside to the next pair. I sewed together the last two pairs of the set, matching the center seams, and making sure that the seams were laying in opposite directions, to reduce bulkiness.

After pressing all units the same as before, I added the last set of pairs. This time pressing the seams toward the middle. Now, I had a unit of three pairs, and a unit of three squares.

All that's needed to finish the block is to add the last row of squares.

I finish sewing the last row to the block, and pressed the final seam toward the outside of the block.

I now had a finished 9-patch block...! It's important to turn the block over, and check that the seams are laying straight like this:

Take the time now, and the finished project will lay out smoother. Now, I swapped the positions of the white and scrappy squares and ended up with two piles of blocks.

Sixty blocks total. Now, I started to join the blocks together, alternating the two blocks. I know that most quilters create rows to sew together. I like to join the blocks into squares of four. Then, continuing to sew the bigger blocks together.

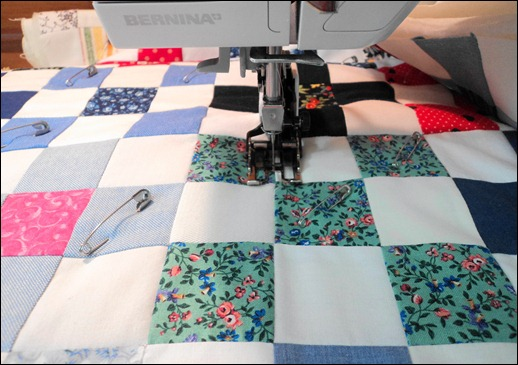
Also, when joining the blocks together, I match both the corner seams. This really keeps everything nice and straight. When all the blocks are joined, I had 5 rows by 12 rows. Time to make a quilt sandwich. Layer the completed top over the batting, with the backing fabric on the bottom. Pin together with the large, quilting safety pins. Be careful not punch holes in the fabric or pull threads. Finish pinning and you're ready to quilt..!

I quilted using the "stitch in the ditch" method. Which is sewing over the seams with invisible quilting thread.
I pieced the backing with a cream colored cotton and a small, floral print that's also the binding.

I then finished it with double fold binding. I just used straight of the grain-cut binding, I cut 2-1/2" strips across the fabric. If you would like to finish with bias binding you can find instructions here.


